Saturday, January 22, 2011

Colours and textures of summer

A few snapshots of Summer in Robertson.

 Herbs on my front verandah.  I love this rustic barrow.
A rose that seems to have multiple hearts.

Wild daisies.

An old looking, new letter box.

Blackberries in the making.

Not so dry, dry stone walls.


Fuchias or ballerinas?

Hydrangeas stunning in blue.

A dingy swallowtail butterfly.
Morning dew.

Friday, January 21, 2011

Perfect muffins

After trying many recipes, finally the perfect muffins!

Banana and walnut muffins

Here's the recipe
2 1/2 cups plain flour
2 teaspoons baking powder
3/4 cup brown sugar
3/4 cups buttermilk
2 eggs
3 tablespoons melted butter
1 teaspoon vanilla essence

Preheat the oven to 180 degrees centigrade.
Grease muffin pans

Mix flour and baking powder. Add brown sugar.
In a separate bowl, whisk buttermilk, eggs, melted butter and vanilla.
Make a well in the centre of the dry ingredients, add wet ingredients and stir until just combined. Don't over mix.
Add fruit of your choice.
Spoon into prepared muffin pan. Bake for 20 minutes or until golden.
Apple, sultana and cinnamon muffins

I take this to work for breakfast on the go or share with workmates for morning tea.
Hope you enjoy them.

Saturday, January 15, 2011

Why blog?

Considering today I have made by first blog post since July last year this seems a very pertinent question. Its still basically New Year so all questions about life, work and happiness are pertinent.

Firstly I didn't deliberately stop posting. In August and September work was very crazy so I had to shelve all other creative pursuits. Depressing though it was to let work take over one does need to preserve one's sanity and there isn't always enough energy for everything we want to do.

Mid September we headed to Europe for a month long holiday which was simply divine. A week in Paris, a week in Cote d'Azur, a few days in Cortina in the Dolomites in Northern Italy and then a week in Venice. I would have loved to blog whilst I was away but we didn't take a laptop and I found internet cafes too scarce.

Then I came back and life seemed crazy again. But its January so time to regroup and reconsider all priorities.

Yes I want to keep blogging. Probably no one will ever read any of it or view my photos. But it is a way to keep sight of what is important to me. If I have nothing to blog about then I am not being authentic, not being me. I love sewing, embroidering, learning to watercolour, gardening, cooking and seeking a way to jump off the workforce merry-go-round and spend more time for me. So if I keep chipping away at my goals I will have plenty of homespunbliss topics to share.

So my blog will be my personal barometer and keep me to my goals. If you want to come along for the ride, please jump aboard. I'll be happy to chat to you.

Here's to a fabulous, creative 2011.

Salvaged furniture

Our local tip has a very good shop where they sell salvaged goods like toilets, bicycles, furniture, crockery and clothes.  I have picked up some great outdoor chairs there recently.  This rocking chair was a mess with lots of layers of paint and rust.
I stripped it back, repainted it and made a new cushion to give it a new lease of life.

The cushion cover has been made out of a fabulous vintage table cloth I found at an op shop.It is very comfortable and looks great on our verandah.

Question - what do you call an op shop? Op is short for opportunity and is a shop run by a charity selling second hand goods, especially clothes.  Do you call it charity, thrift, jumble?

Saturday, July 31, 2010

Pelicans at Greenwell Point

Today's post is dedicated to my sister, for her enduring love of pelicans.

Last weekend Howard and I went for a drive and ended up at Greenwell Point on the south coast of New South Wales and of course I took my camera along. Greenwell Point is a sleepy fishing village like its counterparts in northern New South Wales 30 years ago. This town is still unspoilt by big resorts and fancy hotels. Famous for its oysters, it boasts mudflats rather than white beaches.

But I was able to fire off some shots of some of my favourite subjects.

Jetties
Boats

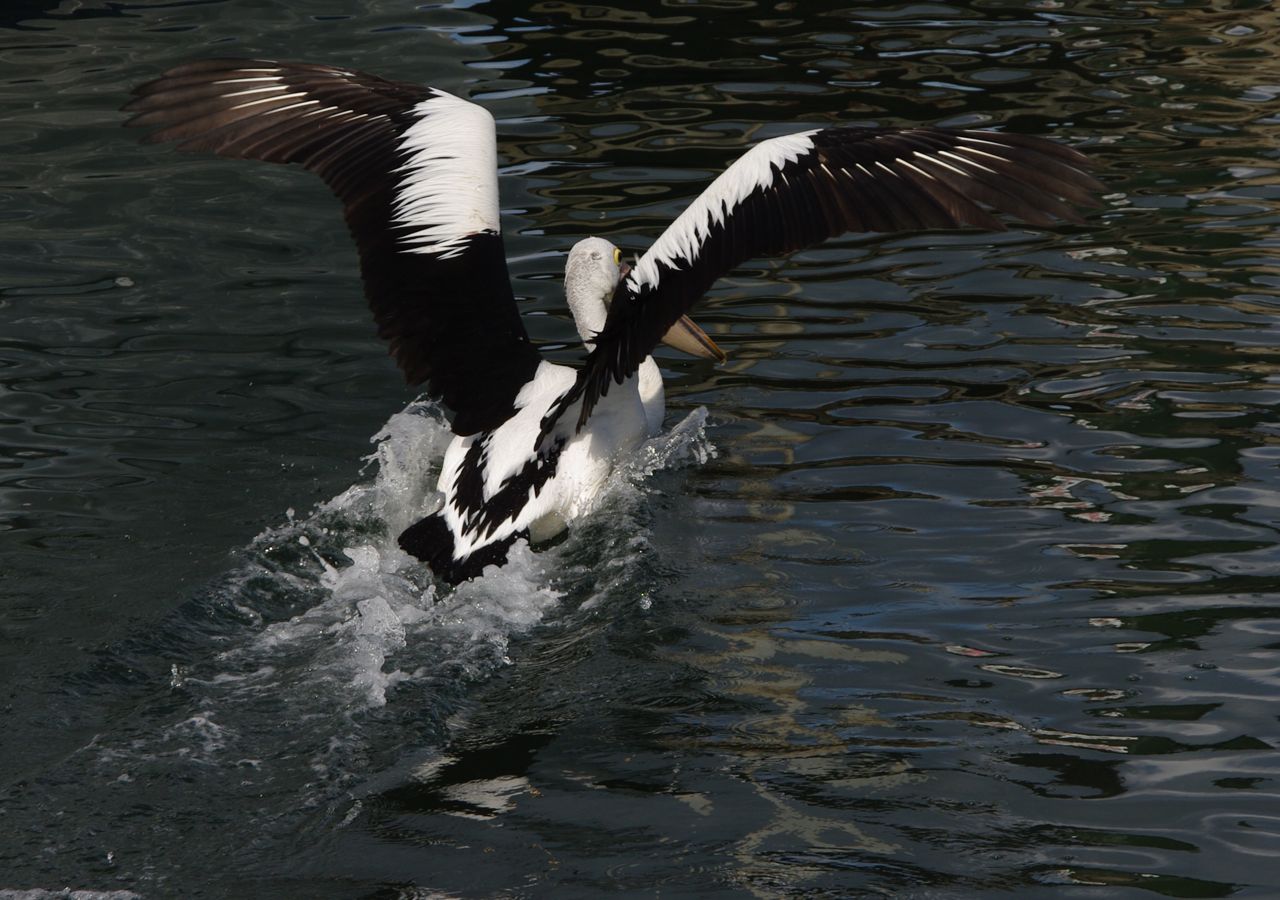
The best shots of the day however were pelicans. This happy looking pelican was eyeing off the day's big catch being cleaned, hoping for treats.  

The next sequence of photos I am particularly proud of. I never thought I would get such a clear set of images of a pelican taking off from the water. I hope you enjoy them too.


I have been working with images of pelicans for some time. So I thought I would share with you the embroidery I created with pelicans as the theme. I apologise that it the photo is not 100% clear but it is under glass.  The pelicans are padded to give a 3D effect.


Thursday, July 22, 2010

Online tutorial rose brooch

These pretty little roses are straight from my studio. Made from satin, organza, cotton, linen and corduroy they are the prefect solution to using up scraps of fabric.  I have been having a lot of fun making these roses this week so I thought I would share them with you.  The following instructions are adapted from Tone Finnanger's book Sew Pretty Homestyle.

Step 1
Choose two pieces of fabric approximately wide and long.  I prefer to use two different fabrics for contrast. This rose is made from pink corduroy and pink gingham.  Lay the strips out right sides together and pin.


Step 2
Trace the rose pattern onto the fabric with a fading marker pen. The image above shows half the pattern -  flip over to the right to make the complete shape.
Step 3
Sew around the marked shape.  Do not cut out the shape until after you have sewn it. Leave a gap in the centre of the long side so you can turn your shape inside out.  
Cut out leaving a small 5-6mm seam allowance. 
Step 4
Turn your shape inside out. Iron into shape.  Don't worry about ironing it crispy. You want it to still have a bit of life and bounce in it. 
Step 5
Choose which fabric will be the inside of your rose. You will see more of this fabric.  If you have used two different weights of fabric choose the lighter one for the inside.  Start at the left hand end of the strip and sew running stitches along the straight edge.  Leave the end of the thread dangling when you finish.   Curl up the left hand end about 4 times and with a new thread stitch across the bottom to secure.  Pull the dangling thread to gather the rose.  
Step 6
Gradually wrap the strip around itself and secure at the bottom. The tighter you gather it the harder it will be to sew across the bottom.  Gradually adjust the tension of the gathering as you go to create a nice workable tension.
Step 7
Keep wrapping and sewing until you reach the end of your strip. Neatly finish the curved end of the strip in place. I find that I run out of sewing thread a short distance before the end of my strip. At this point you can start sewing from the end using your gathering thread. This will help secure the whole package with no fear of it coming apart. 
Step 8
Turn your rose over. Check it there are any areas that aren't sewn securely or neatly. Sometimes the bud at the centre will feel loose or be sitting askew. Push a threaded needle through the centre of the bud towards the back of the rose and secure. You may need to do this more than once. As you can see you have just created your very first rose. Its looking great but will benefit from a little more shaping. 

Step 9
Start turning the edges of the fabric out to give the rose more body and create the illusion of petals.
Voila your rose is finished.  Now you can decide how you are going to use it. You could sew it directly onto a blouse, bag or whatever. I have made mine into brooches. If you want a brooch then there is one more step.
Step 10
Cut a circle of felt big enough to cover your stitches on the back of the rose.  Sew on a brooch pin. Using a clear craft glue position the felt on to the back of the rose. Sew around the edges of the felt with blanket stitch to keep the felt and pin secure.

I hope you enjoy your rose. I'd love to see what you've made!


Wednesday, July 21, 2010

My pink give away heart finds a new home in Oxford

One of the winners of my hearts give away, Debby, has received her heart and posted about it.  The great news is she loved my little heart and was kind enough to post some encouragement about my DarlingBridget business. Thanks Debby!
Read her post here.  You might like to stay a while and read some of her other posts on Cooking up a storm in a tea cup.

LinkWithin

Related Posts Plugin for WordPress, Blogger...